Freedom Rail Information
Purchasing Your freedomRail System |
 |
|
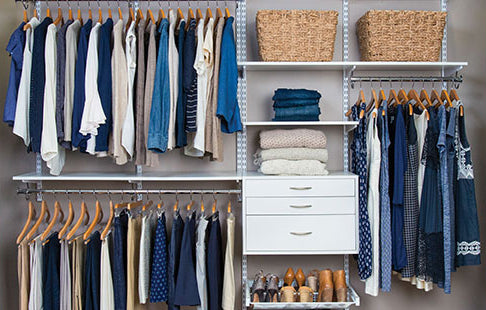
The freedomRail system allows you to create a completely custom shelving and storage unit. With freedomRail, you're the designer. Freedom Rail's flexible design lets you configure and reconfigure your system as your storage needs change. You can move, add or remove shelves, Organization-Boxes (O-Boxes) and accessories whenever you choose. The freedomRail system is easy to install, adjust and upgrade, and can create an ideal closet, pantry, wall shelf, library or garage. You can even use the freedomRail components to create an entertainment center for your media room, or a desk for your office.
|
|
| How It Works: |
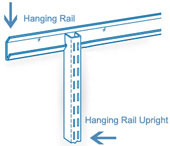
Two components create the skeleton of the freedomRail system. The Hanging Rail attaches horizontally to the wall, and holds all of the weight of the freedomRail system. The Hanging Rail Uprights attach to the Hanging Rail and provide the spaces for shelf brackets and O-Boxes. You can place a component anywhere you want along the Hanging Rail Uprights. You can create a column of shelves between two uprights, but remember that each shelf will need to be held on each end by an upright.
To give you an idea, the most rudimentary freedomRail system would be a one shelf unit, and would include the following:
|
 |
|
| Choosing Components: |
Here, you will want to take the time to measure your space. Measure the width of the wall or closet where your freedomRail system will go. Also measure the height of the system. It's not important to decide where exactly your shelves will go yet. Also, all of the freedomRail components are available in your choice of White or Brushed Nickel finish; decide which color fits your needs and decor.
|
| Hanging Rail |
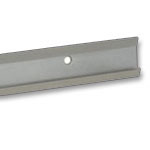
Once you've measured twice, you can choose your Hanging Rail. First decide whether you want to system to be white or brushed nickel (all metal components are available in either finish). The Hanging Rails are available in 40", 64" or 80" width, but remember that you can always cut them down to size. For example, if your wall is 70" wide, you will choose the 80" Hanging Rail and cut it to size. Now, if your wall is 100" wide, get the 40" and the 64", cut 4" off either section, and mount them next to each other.
To mount the Hanging Rail, you will need Screws and Anchors. These are specifically designed for freedomRail installation. While the manufacturer says you do not need to mount the Hanging Rail to studs, our installers have strongly recommended that you try to drill into as many studs as possible. See detailed Instruction Instructions for freedomRail. Note that most freedomRail wall systems will be mounted at standard door height (about 84"); however, you can mount the Hanging Rail at any height on the wall. |
 |
|
| Uprights |
Make sure everything matches, and pick the Uprights in the finish, either White or Brushed Nickel, that you have already decided upon. Since you have measured the height of the system, you know approximately how tall you want your Uprights.
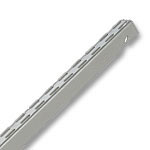
There's a trick, though. If you want to create a column of shelves, you will need the longest Uprights that your wall will hold. The longer the Upright, the more flexible it is, because you can use it for shelves, O-Boxes or just cover it with hanging clothes. If you plan to reconfigure your freedomRail system often, your best bet is to use the longest Hanging Rail Uprights that your wall will support all the way across your system. The Hanging Rail Uprights are available in 30", 48" and 74" heights. The 48" tall Uprights are perfect for double hang closets, and the 30" Uprights work well for long hang closets. You do not need to secure the Hanging Rail Uprights to the Wall because they do not support any weight. However you may want to attach them to prevent the upright from swinging or pulling away from the wall. This is especially true when using O-Boxes with drawers. To secure the uprights you would use Upright Clips. If you are using Wall Mounted Uprights, they need to be attached directly to the wall using Screws and Anchors. These Uprights are available only in a white finish, and do not require a Hanging Rail. |
|
|
| Shelves |
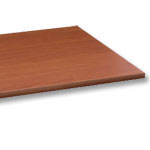
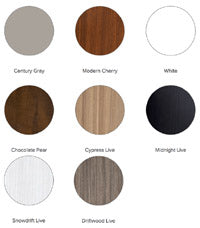
Two different types of shelves are available: Solid Melamine and Profile Wire. Both types of shelving have their advantages. In most cases, one type will better suit the shelving application than the other. Of course, you can always mix Profile Wire Shelves and Melamine Shelves into the same freedomRail system.
|
|
|
| Shelf Brackets |
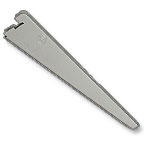
Regardless of whether you choose a Profile Wire Shelf or a Solid Melamine Shelf, you will need at least two Shelf Brackets. The shelf brackets attach the shelves to the Hanging Rail Uprights. You will want to place a Shelf Bracket everywhere that a Hanging Rail Upright and a shelf intersect. You do not want to span more than 24 inches without an upright and bracket.
|
 |
|
| Organization Boxes |
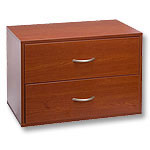
Several different styles of O-Boxes are available. Depending upon your application, you can choose O-Boxes with shelves or drawers. We even offer a special File Cabinet O-Box for home office applications, and a Shoe Cubbies O-Box for shoe storage in a closet and pantry applications.
There are two things you should know about O-Boxes:
|
 |
|
| Closet Rods |
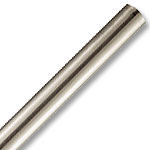
Adding a Closet Rod to your freedomRail closet system allows you to hang garments. A Closet Rod may be installed at any height along the freedomRail Upright, given that there is a shelf for the Closet Rod to connect to. The Closet Rod will be held in place using Rod Clips. These Rod Clips each attach to the bottom of a shelf bracket, and hold the Closet Rod securely in place. Closet Rod Stops are then added to the ends of the Closet Rod to keep your hangers from sliding off.
For each closet rod section, you will need the following:
|
 |
|
 |
If at any point during this process you have questions, do not hesitate to Contact Us and we would be happy to answer any questions you may have. You can also purchase a Closet Design Consultation and have a professional closet designer help you design your dream closet. |


